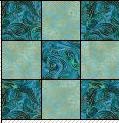
I attached the hanging sleeve on my Autumn Sampler WH totally by machine. I took a few photos during the process so I could share it with you here.
I finished all the quilting first. I trimmed my piece to its finished size, right up to the binding stage.
I have a narrow border strip separating the quilt center and the final border. This strip will frame the quilt center and serve as a placement guide for attaching the sleeves.
What size to cut your sleeve?
The
width of the sleeve will be determined by the width of your final border, times two (2) plus one inch or so. One half inch will be taken up in the seam allowance when attaching the folded edge. The other half inch (or so) is extra insurance that your sleeve will reach the raw edge or beyond, when folded up into place.
my final border 2.25 inches
to double layer x 2
plus SA & extra
+ 1 inch
sleeve width = 5.50 inches
====
Length of Sleeve?
I usually like my sleeves to have an opening in the center of the quilt. This lets me choose other hanging options such as using a dowel supported in the center or using a rod supported at both ends. So I cut one long sleeve, then cut it in half.
I also make one long sleeve for the bottom of wall quilts to insert a curtain rod, dowel, ruler or yardstick. This helps them hang straight and hug the wall. Do
NOT cut this one in half.
The
length of the sleeve depends on the width of the quilt. This quilt is 25 - 1/4 inches wide. I'll want my sleeve to reach about 22 inches. I have to add an inch for hems on the short ends.
So, I will cut 2 sleeves at 5 - 1/2" x 23".
Cut one sleeve in half; fold in the 4 short ends 1/4", then fold over again - 1/4" ; iron and stitch.
Fold in and stitch down the 2 short ends on the 2nd long sleeve also. Then,
With wrong sides together,
press in half, lengthwise
See the yellow flowerhead pins? This marks the seam between the narrow black border strip and the outer border. The pins are my placement guide on the back for setting in the hanging sleeves.
Turn the quilt over to the back. Place the sleeves 1/4" over/above the pin markers so the folded edge is above the pin markers and reaching for the top of the quilt and the raw edge of the sleeve is reaching for the bottom edge.
Near the folded edge,
baste in place.
Turn quilt to right side, stitch in the ditch (SITD) around the frame border. This step will include the folded edge of the sleeves. Remove the basting.
I like my quilt to hang above the rod, so I stitch a "stopping point" through the sleeve pieces. This allows the rod to stop at the middle seam and not go all the way up to the binding.
Spread the sleeve pieces away from the body of the quilt. Stitch another seamline through both layers, about 1-1/2" from raw edges of sleeves. This will allow the quilt to sit about 1" above the rod.
Press sleeves right side up/forward, so the top raw edge meets the raw edge of the quilt. If you added extra for insurance on the sleeves, this is the time to trim them even with the quilt edge. Secure the sleeve edge with pins until the binding is stitched on.
Add the Binding
Now you can add the binding. This step will enclose the raw edge of the sleeves. I have been stitching my binding to the backside first, then folding to the front and top stitching down.
Here is a pic of my finished quilt with sleeve. I don't often take time to make labels, especially on small projects. Some projects I like to acknowledge I made them (grin), so I use the text font on my sewing machine to stitch my name and year. I incorporate that piece into part of the sleeve. Ah, shortcuts............... makes time for more quilts. LOL
I hope this tutorial gives you some new methods and ideas. I wish you a blessed and Happy Day!


