Greetings. Welcome to my blog post in honor of Hands to Help. campaign. I make donation/comfort quilts for gifting all year long. I can't imagine why I've not participated in the Hands 2 Help program before now. Click on this icon to take you to all the information about Hands 2 Help. Please be inspired to also participate.

I use EQ8 and it lets you soar with unlimited design possibilities. Today I'm happy to share with you a quick and easy pattern design. One simple block, 4 colors and you can create your own design simply by rotating the blocks. I have not been able to come up with a catchy name for this design, so I'm sorry to say it is called 3-Part Triangles.
Here is my original version of the 3-Part Triangle quilt. It measures 56 x 56. I used fabrics hoping to appeal to a young teen, pinks and red print. I quilted it with pink aurifil thread.


Fabric Requirements ( EQ is generous with fabric requirements ) and it is very helpful to mention how many patches to cut

Rotary Cutting for 12 inch finished blocks

Now for the pattern instructions:
 |
| 56 x 56 |
Make ( 64 ) 3-part triangle units as follows:
 |
| 6 - 1/2 " |
 |
| 6 - 1/2 " |
 |
| 6 - 1/2 " |
Assemble 12 outer blocks:
 |
| 12 - 1/2 " |
Rotate and assemble as shown here:

Assemble 4 center blocks:
 |
| 12 - 1/2 " |
Rotate and assemble as shown here:
 |
Borders:
 Cut ( 5 ) strips @ 1-1/2" x width of fabric for inner border

Cut ( 6 ) strips @ 3-1/2" x width of fabric for outer border
Binding: Cut ( 6 ) strips @ 2-1/2" x width of fabric for binding
++++++++++++++++++++++++++++++++++++++++++++++++++++
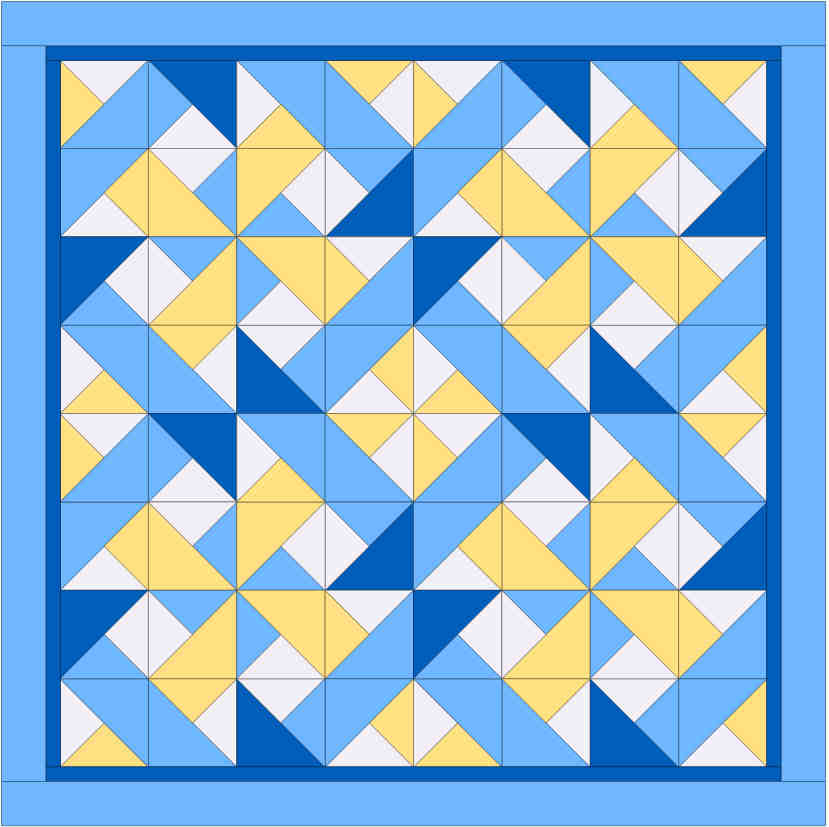
Here are some more color and symmetry examples. I hope they inspire you to get stitching!

Make 12 blocks

Make 4 blocks

My fav. This one I named Blue Bows

Need a rectangle quilt - make 24 blocks ( 62 x 85 )


Make 16 blocks

Monday - Small Quilts & Doll Quilts
Wednesday - Quilt Fabrication
Thursday - My Quilt Infatuation
Friday - Alycia Quilts
Oh Kat, this is a beautiful quilt! Thank you for the pattern, looks a perfect one for a baby donation quilt.
ReplyDeleteWhat a beautiful quilt, and it looks really easy, too. Thanks so much for sharing!
ReplyDeleteWhat an interesting pattern! Thank you for all the instructions and possibilities!
ReplyDeleteLove it, Kat!
ReplyDeleteVery cool quilt, Kat!! Thanks for taking the time to figure all that out for H2H.
ReplyDeleteWhat a great block. Hum,I’ll have to see which dies I have to be able to make one of these… or maybe check if the 9” cube would work. Thanks for sharing.
ReplyDeleteYour pink quilt is a beautiful one, Kat! And I love all the things you can do with those 3 Part triangle blocks. Simple block, but great designs!
ReplyDeleteOh what fun!! And with a little color change you made the quilts look so different! I love it!
ReplyDeleteGotta love a simple to make block that makes into an impressive quilt, thanks for sharing!
ReplyDeleteNice quilt! Thanks for sharing this pattern.
ReplyDeleteWonderful designs! Thank you for sharing. Pinning.
ReplyDeleteThis is a great design! I know there'll be a lot of quilts made for it and they have you to thank for it! Thanks for sharing on Wednesday Wait Loss.
ReplyDeleteLove the pattern. Thanks for sharing it with us! And your quilting highlights the piecing so well. Plus the backing is great for it.
ReplyDeleteLove your pink creation and the quilting too!
ReplyDeleteFabulous. Love all the options. Thanks for sharing and inspiring.
ReplyDeleteSo lovely, it makes a beautiful weaving effect!
ReplyDeleteThanks for the pattern! It's just what I like, a quilt that looks super complicated but is definitely do-able. Very pretty colors, and I just love the backing.
ReplyDeleteThanks for showing variations - I just don't seem able to visualize, so really appreciate it. Loving the pink and red...and the feathers are beautiful!
ReplyDelete