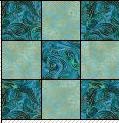
A Bloomin Baby Patch quilt is on my design wall today.
Hop on over to Patchwork Times to see what other creative quilters have on their design wall today.
Monday, September 30, 2013
Friday, September 27, 2013
Blooming 9-Patch Quilt Along
We are having a QAL over at Cbees yahoo group this weekend. There are some questions on how to go about the planning of a Blooming 9-Patch. Since I can include photos here, I thought I would show how I am approaching my plan.
The quilt is 45 x 49 inches. All the blocks finish at 3 inches. Here is my quilt layout:
Fabric Requirements:
It may seem odd, but if I have limited quantity of a fabric, I figure my needs in inches. I have only 35" of my dark blue paisley. EQ said I needed 1-1/4 yd for this fabric. So, I worked my cutting out in inches, a daunting task. Hopefully no errors, it came out needing 32".
I am concentrating on the center design for now. We'll deal with the borders and binding later.
dark blue paisley ............... 32 "
light blue ........................... 16 "
light green ......................... 26 "
Cut the squares and triangles first. You can cut from the leftovers to use in the 9-patches.
Cut ( 36 ) squares @ 3-1/2 "
Cut ( 18 ) squares @ 3-1/2 "
Cut ( 2 ) strips @ 6 "; from these strips cut :
these are slightly oversize, but you will trim them later, plus you will get more cutting options from the leftover
Cut ( 8 ) squares @ 6 "
Cross cut the 8 squares into 32 side triangles; you will be using 30 triangles
Cut ( 4 ) squares @ 3-1/2 "; 2 of these are for the quilt center, 2 are for the corner triangles
Cross cut 2 of the above squares into ( 4 ) hst for corners
Make 30 @ 3-1/2 "
Make 6 @ 3-1/2 "
Make 14 @ 3-1/2"
Make 22 @ 3-1/2"
Friday Quilt Hop
Lets start the weekend with a quick quilt hop:
I usually don't like selvege quilts, but this one is sew cute!
so modern, so simple, such variety
amazing detail of a furry friend
this one will wow you
a simple quilt using stripe fabrics
http://artgalleryfabrics.typepad.com/weblog/2012/07/striped-strips-anyone.html
simple squares on pointe with instructions
http://www.favequilts.com/Bed-Size-Quilts/Chinese-Windows-Bed-Quilt-from-Art-Gallery-Fabrics/ml/1
simple squares on pointe with instructions
http://www.favequilts.com/Bed-Size-Quilts/Chinese-Windows-Bed-Quilt-from-Art-Gallery-Fabrics/ml/1
Monday, September 23, 2013
16-Patch Star Quilt
This is what's on the design wall today. I have been taking part in the Rainbow Scrap Challenge 2013 over at Soscrappy . Every month we dig out the scraps of a specific color family and create anything you want to. I have been making these blocks at 16" finished. Only 3 months to go and it will make a hefty 48 x 64 before borders.
Hmmmm. I wonder what I'll do for next years' scrap challenge? I'm already on the lookout for a new plan. If you want to jump on board, just click the RSC13 button on my left sidebar. I love her rules. You are never behind with this challenge.
So hop on over to PatchworkTimes to see what other ambitious quilters have on their design wall today.
Hmmmm. I wonder what I'll do for next years' scrap challenge? I'm already on the lookout for a new plan. If you want to jump on board, just click the RSC13 button on my left sidebar. I love her rules. You are never behind with this challenge.
So hop on over to PatchworkTimes to see what other ambitious quilters have on their design wall today.
Saturday, September 21, 2013
Scraphappy Saturday - More Baby Blues
I took time to use some more baby blues this week, although it was from larger pieces of scraps. This is a purse tissue cover which holds those little packets of tissues without the noise of the plastic wrap. If I run out of tissues, sometimes I will use a few table napkins or fold some tissues from the large Kleenex box.
I didn't have time to use more of these blues or make crumb blocks this week because I was deep into mass production of these tissue packets. A special 'Sister' at the catholic retirement facility asked for more of these for their gift shop. She uses the proceeds from the gift shop to help feed the hungry. I love the opportunity to gift her.
So ................................... I made 48 of them. I will keep a few to give to the special ladies in my United Methodist Womens Circle. Once I started giving these out, they have become very popular. Here is the most recent batch. I hope I won't need to make any more this year.
I am linking up with Soscrappy where you can see what everyone else is doing with their baby blues this week.
I didn't have time to use more of these blues or make crumb blocks this week because I was deep into mass production of these tissue packets. A special 'Sister' at the catholic retirement facility asked for more of these for their gift shop. She uses the proceeds from the gift shop to help feed the hungry. I love the opportunity to gift her.
So ................................... I made 48 of them. I will keep a few to give to the special ladies in my United Methodist Womens Circle. Once I started giving these out, they have become very popular. Here is the most recent batch. I hope I won't need to make any more this year.
I am linking up with Soscrappy where you can see what everyone else is doing with their baby blues this week.
Friday, September 20, 2013
Friday's Quilt Hop
Greetings! I'm not quite ready to share my current quilting project, so I'll share some inspiring quilts.
This is a gorgeous medallion with traditional quilting specific to the block units
Just in time for autumn,
Amazing Art, I would love this on my wall
A tutorial for an easy Christmas Tree skirt
I love them all - real and quilted
I hope you find something inspiring and wonderful to start your weekend.
Monday, September 16, 2013
Scrap Scramble - Block 1
It is Design Wall Monday. I am sharing my first block of a new paper pieced BOM. It will probably be made entirely from my scrap bins that never get empty. This is September of the Scrap Scramble project.
So hop on over to Patchwork Times and see what everyone else is quilting up today.
Saturday, September 14, 2013
Scraphappy Saturday - Baby Blues
Here is my 16-patch scrappy star block for September, my baby blues from the scrap bin. I am a few months behind in my 6" crumb blocks and more projects are getting in line, so that may have to be a focus for next year. My photography is always a challenge and these blues are really a softer shade than they appear here.
So hop on over to Soscrappy and see what everyone else is sharing for their RSC13 challenge for September baby blues.
Friday, September 13, 2013
Friday's Quilt Show
Sometimes I am clicking the internet, collecting new inspiration when I should be sewing something or cleaning something. So, I thought I would share some eye candy, pattern links and tutorial links here. So now you can click your way to new inspiration.
Wow. This one is really cool
this is a fun one
if you like paper piecing
a plentiful listing of tutorials
I hope you enjoy the show and find something wonderful!
Thursday, September 5, 2013
Hanging Sleeves By Machine
I attached the hanging sleeve on my Autumn Sampler WH totally by machine. I took a few photos during the process so I could share it with you here.
I finished all the quilting first. I trimmed my piece to its finished size, right up to the binding stage.
I have a narrow border strip separating the quilt center and the final border. This strip will frame the quilt center and serve as a placement guide for attaching the sleeves.
What size to cut your sleeve?
The width of the sleeve will be determined by the width of your final border, times two (2) plus one inch or so. One half inch will be taken up in the seam allowance when attaching the folded edge. The other half inch (or so) is extra insurance that your sleeve will reach the raw edge or beyond, when folded up into place.
my final border 2.25 inches
to double layer x 2
plus SA & extra + 1 inch
sleeve width = 5.50 inches
====
Length of Sleeve?
I usually like my sleeves to have an opening in the center of the quilt. This lets me choose other hanging options such as using a dowel supported in the center or using a rod supported at both ends. So I cut one long sleeve, then cut it in half.
I also make one long sleeve for the bottom of wall quilts to insert a curtain rod, dowel, ruler or yardstick. This helps them hang straight and hug the wall. Do NOT cut this one in half.
The length of the sleeve depends on the width of the quilt. This quilt is 25 - 1/4 inches wide. I'll want my sleeve to reach about 22 inches. I have to add an inch for hems on the short ends.
So, I will cut 2 sleeves at 5 - 1/2" x 23".
Cut one sleeve in half; fold in the 4 short ends 1/4", then fold over again - 1/4" ; iron and stitch.
Fold in and stitch down the 2 short ends on the 2nd long sleeve also. Then,
With wrong sides together,
press in half, lengthwise
See the yellow flowerhead pins? This marks the seam between the narrow black border strip and the outer border. The pins are my placement guide on the back for setting in the hanging sleeves.
Turn the quilt over to the back. Place the sleeves 1/4" over/above the pin markers so the folded edge is above the pin markers and reaching for the top of the quilt and the raw edge of the sleeve is reaching for the bottom edge.
Near the folded edge,
baste in place.
Turn quilt to right side, stitch in the ditch (SITD) around the frame border. This step will include the folded edge of the sleeves. Remove the basting.
I like my quilt to hang above the rod, so I stitch a "stopping point" through the sleeve pieces. This allows the rod to stop at the middle seam and not go all the way up to the binding.
Spread the sleeve pieces away from the body of the quilt. Stitch another seamline through both layers, about 1-1/2" from raw edges of sleeves. This will allow the quilt to sit about 1" above the rod.
Press sleeves right side up/forward, so the top raw edge meets the raw edge of the quilt. If you added extra for insurance on the sleeves, this is the time to trim them even with the quilt edge. Secure the sleeve edge with pins until the binding is stitched on.
Add the Binding
Now you can add the binding. This step will enclose the raw edge of the sleeves. I have been stitching my binding to the backside first, then folding to the front and top stitching down.
Here is a pic of my finished quilt with sleeve. I don't often take time to make labels, especially on small projects. Some projects I like to acknowledge I made them (grin), so I use the text font on my sewing machine to stitch my name and year. I incorporate that piece into part of the sleeve. Ah, shortcuts............... makes time for more quilts. LOL
I hope this tutorial gives you some new methods and ideas. I wish you a blessed and Happy Day!
I finished all the quilting first. I trimmed my piece to its finished size, right up to the binding stage.
I have a narrow border strip separating the quilt center and the final border. This strip will frame the quilt center and serve as a placement guide for attaching the sleeves.
What size to cut your sleeve?
The width of the sleeve will be determined by the width of your final border, times two (2) plus one inch or so. One half inch will be taken up in the seam allowance when attaching the folded edge. The other half inch (or so) is extra insurance that your sleeve will reach the raw edge or beyond, when folded up into place.
my final border 2.25 inches
to double layer x 2
plus SA & extra + 1 inch
sleeve width = 5.50 inches
====
Length of Sleeve?
I usually like my sleeves to have an opening in the center of the quilt. This lets me choose other hanging options such as using a dowel supported in the center or using a rod supported at both ends. So I cut one long sleeve, then cut it in half.
I also make one long sleeve for the bottom of wall quilts to insert a curtain rod, dowel, ruler or yardstick. This helps them hang straight and hug the wall. Do NOT cut this one in half.
The length of the sleeve depends on the width of the quilt. This quilt is 25 - 1/4 inches wide. I'll want my sleeve to reach about 22 inches. I have to add an inch for hems on the short ends.
So, I will cut 2 sleeves at 5 - 1/2" x 23".
Cut one sleeve in half; fold in the 4 short ends 1/4", then fold over again - 1/4" ; iron and stitch.
Fold in and stitch down the 2 short ends on the 2nd long sleeve also. Then,
With wrong sides together,
press in half, lengthwise
See the yellow flowerhead pins? This marks the seam between the narrow black border strip and the outer border. The pins are my placement guide on the back for setting in the hanging sleeves.
Turn the quilt over to the back. Place the sleeves 1/4" over/above the pin markers so the folded edge is above the pin markers and reaching for the top of the quilt and the raw edge of the sleeve is reaching for the bottom edge.
Near the folded edge,
baste in place.
Turn quilt to right side, stitch in the ditch (SITD) around the frame border. This step will include the folded edge of the sleeves. Remove the basting.
I like my quilt to hang above the rod, so I stitch a "stopping point" through the sleeve pieces. This allows the rod to stop at the middle seam and not go all the way up to the binding.
Spread the sleeve pieces away from the body of the quilt. Stitch another seamline through both layers, about 1-1/2" from raw edges of sleeves. This will allow the quilt to sit about 1" above the rod.
Press sleeves right side up/forward, so the top raw edge meets the raw edge of the quilt. If you added extra for insurance on the sleeves, this is the time to trim them even with the quilt edge. Secure the sleeve edge with pins until the binding is stitched on.
Add the Binding
Now you can add the binding. This step will enclose the raw edge of the sleeves. I have been stitching my binding to the backside first, then folding to the front and top stitching down.
Here is a pic of my finished quilt with sleeve. I don't often take time to make labels, especially on small projects. Some projects I like to acknowledge I made them (grin), so I use the text font on my sewing machine to stitch my name and year. I incorporate that piece into part of the sleeve. Ah, shortcuts............... makes time for more quilts. LOL
I hope this tutorial gives you some new methods and ideas. I wish you a blessed and Happy Day!
Wednesday, September 4, 2013
Autumn Sampler W.H.
Another finish, I'm on a roll. Do you ever get really inspired and go into overdrive and can't seem to stop stitching? I'm experiencing that lately. I hope it never ends. LOL
I was inspired by a photo on google recently and just had to make a similar piece. I cut the appliques out of a panel I bought at a Relay for Life garage sale. I love designing around panels and blocks and motifs from panels.
So here it is. I call it my Autumn Sampler. I do wish I had chosen a different quilting path, but it's done.
May you have a blessed and happy day!
I was inspired by a photo on google recently and just had to make a similar piece. I cut the appliques out of a panel I bought at a Relay for Life garage sale. I love designing around panels and blocks and motifs from panels.
So here it is. I call it my Autumn Sampler. I do wish I had chosen a different quilting path, but it's done.
May you have a blessed and happy day!
Monday, September 2, 2013
Autumn Rose Wreath
I just finished my miniature Autumn Rose Wreath - full of little pieces of fall fabrics. I love this little pattern. I just wish it would use up more scraps. It measures a whopping 14 inches square and hangs from my tabletop wire frame.
Go to my Free Pattern page to get your copy of the paper pieced pattern. I am linking up to the design wall over at PatchworkTimes where you can see what other talented quilters are up to.
Wednesday, August 28, 2013
Hidden Wells Christmas
I nearly forgot to share my third recent quilt finish. It was a Hidden Wells quilt a-long we did a few years ago on Cbees group. I used a christmas collection in brights. It is also lap size comfort for a child. It is not my best quilting work. I had troubles with the layers during stitching. So don't look too closely.
The hidden wells technique is fun, working from strip sets or using an interesting stripe fabric. If you want to try it out, Moose Stash Quilting has a good tutorial.
Thanks for visiting. I wish you a blessed and happy day.
The hidden wells technique is fun, working from strip sets or using an interesting stripe fabric. If you want to try it out, Moose Stash Quilting has a good tutorial.
Thanks for visiting. I wish you a blessed and happy day.
Saturday, August 24, 2013
Purple Strings Quilt
This pretty little quilt is the result of a challenge inspired by Heartstrings Quilt Project. The task was to make string blocks using a purple center strip. I like how it turned out. It will be given to the children's ward at our local hospital.
Heartstrings Group has just started a new challenge. Try them out. String blocks are SO Theraputic.
Thanks for visiting and I wish you a blessed and happy day.
Heartstrings Group has just started a new challenge. Try them out. String blocks are SO Theraputic.
Thanks for visiting and I wish you a blessed and happy day.
Friday, August 23, 2013
D9P - a lovely finish
I have been away this week, went to a crash course at 'finishing' school. DH set up table space so I could sandwich some flimsys. So I put everything else aside and concentrated on getting those done. I have 3 lap quilts finished.
This quilt is the Disappearing 9-Patch QAL which I participated in over at the Cbees Yahoo group. It is made totally from charm squares, except the four border strips. I thought it came out really pretty and with this technique, it distributed all the different colors effectively. Okay,I may have helped with placement a little.
I haven't photographed the other two finishes yet, but they are out of the dryer and waiting for their 'two minutes of fame'. LOL Have and blessed and happy day!
This quilt is the Disappearing 9-Patch QAL which I participated in over at the Cbees Yahoo group. It is made totally from charm squares, except the four border strips. I thought it came out really pretty and with this technique, it distributed all the different colors effectively. Okay,I may have helped with placement a little.
I haven't photographed the other two finishes yet, but they are out of the dryer and waiting for their 'two minutes of fame'. LOL Have and blessed and happy day!
Monday, August 12, 2013
Dizzy Geese - Finished
I dipped into the scrap boxes to put together this mini hanging. No yardage was hurt in the making of this piece (except the background). I was even able to use up two leftover pieces of binding to finish it off. This piece finishes at 14 inches square. It hangs on my tabletop frame.
So this is what came off my design wall this morning. I'm linking up at patchworktimes where you can check out what other creative quilters are up to.
Have a Happy Day!
So this is what came off my design wall this morning. I'm linking up at patchworktimes where you can check out what other creative quilters are up to.
Have a Happy Day!
Saturday, August 10, 2013
Scraphappy Saturday - Red
When I sorted out my red scrap bin I must have felt very distracted. So many pieces, but I just couldn't bring myself to make the crumb blocks ..... maybe saving those for another week, there is still time.
I did get the 16-patch scrappy star block together. Only 4 more months, and it will be a whole quilt.
I am linking up to Soscrappy, where you can see what everyone else is doing with their red scraps and Have yourself a Happy Day.
I did get the 16-patch scrappy star block together. Only 4 more months, and it will be a whole quilt.
I am linking up to Soscrappy, where you can see what everyone else is doing with their red scraps and Have yourself a Happy Day.
Friday, August 9, 2013
Dizzy Geese Challenge
We have a monthly bucket list challenge over on Cbees. This month is flying geese. The purpose of the bucket list is to broaden your methods or techniques with a selected skill. If you want to join in the fun, you can join the group HERE . It is important to know that Cbees is a sister 'activity' list of Cyberquilters, so you must be a member of Cyberquilters first, before you can join Cbees. Now, stay calm. I know you are joining two yahoo groups, but they are some of the best quilting groups on the internet and membership is FREE ! LOL I'm tempted to say they ARE THE BEST quilting groups, but I also want to avoid receiving any hate mail from members of other groups.
Okay, so I've been working hard, stitching bits and pieces into my Dizzy Geese piece. This is only the center of my piece. I know, it doesnt look like it should be two days worth of work. But, hey, this center piece finishes at 6-1/2 inches square. So, you're more impressed now? LOL
Now, back to the borders. I'm anxious to get this done because I have other projects that I feel ready to get started. So have a Happy Day and see you soon.
Okay, so I've been working hard, stitching bits and pieces into my Dizzy Geese piece. This is only the center of my piece. I know, it doesnt look like it should be two days worth of work. But, hey, this center piece finishes at 6-1/2 inches square. So, you're more impressed now? LOL
Now, back to the borders. I'm anxious to get this done because I have other projects that I feel ready to get started. So have a Happy Day and see you soon.
Saturday, August 3, 2013
Mission Huntington Project 2013
So, my job was to help sew 450 book bags for all incoming 2nd graders in the county. These bags were stuffed with assorted school supplies and later, the students will be able to pick a book or two to keep. We had over 1800 childrens books donated from local families and charity groups.
Okay, so it was handy to be a quilter. I gathered some other quilter help and we cut up all the pieces from bolts of ulpholstery and home dec fabrics in advance. Phew, that did help! We serged and sewed all the bags....510 of them.... in the first four days! I know, I had the easy job, but, I was exhausted!!
![]() |
| DH at the ironing table, a first! |
![]() |
| 510 school book bags |
Sunday, July 7, 2013
Scraphappy Saturday - Teal
Okay, so I know this isn't Saturday and you think this block doesn't look like teal fabrics. Actually, it is teal fabrics - not my favorite collection of teals, with a very grayish tinge. Part of the blame is on the camera and the lighting and the photographer.
I decided to use a dry iron this time. I've been having trouble with the squares wrinkling up and I can't get it to press out. Using a dry iron helped avoid that issue, but I just don't get a nice, crisp pressing.
I also figured it was time to include a pic of all the 16-patch star blocks made so far. I am so tempted to begin quilting them QAYG style. Thankfully, (or not) I am in the midst of several other projects, but you understand how you need to get in some quilting therapy between piecing sessions.
I'll be linking up to Soscrappy where you can visit all the other Scraphappy Saturday participants.
I decided to use a dry iron this time. I've been having trouble with the squares wrinkling up and I can't get it to press out. Using a dry iron helped avoid that issue, but I just don't get a nice, crisp pressing.
I also figured it was time to include a pic of all the 16-patch star blocks made so far. I am so tempted to begin quilting them QAYG style. Thankfully, (or not) I am in the midst of several other projects, but you understand how you need to get in some quilting therapy between piecing sessions.
I'll be linking up to Soscrappy where you can visit all the other Scraphappy Saturday participants.
Subscribe to:
Posts (Atom)