Monday, December 30, 2013

Microwave Hot Pad Bowls

It's design wall Monday over at Patchwork Times.  This is what I have to share today. I'm making a large batch of microwave hot pad bowls.  Yep, use them in the microwave and it's easy to remove your dish out of the oven and straight to the table.

I made kits for 3 sizes .... 14", 12" & 10".  The 10" are perfect for my Corelle cereal bowls.  You will find some similar directions here: http://nebraskaviews.blogspot.com/2013/12/stitching-up-christmas-giftsbowl.html


I'm linking up with Judy at Patchwork Times where you will find lots of other creative quilters sharing their works.

HAPPY  NEW  YEAR !

Saturday, December 28, 2013

Planning for RSC14


'inspiration only, this is NOT my quilt'

I have been saving up ideas and inspiration for the Rainbow Scrap Challenge 2014 for several months!  Initially I was saving them in a folder on my computer ................ until ........................ it occurred to me to make a Pinterest page to collect the designs.

Here is my RSC14 page on Pinterest .. http://www.pinterest.com/KatScribner3/mostly-scraps/.
SO MANY IDEAS !  Some of the links were shared by our RSC host, Angela.

I still haven't narrowed down my choices for 2014 challenge yet. It will probably depend on the shapes and color range in my scrap bins.  I keep  ALL  shapes and sizes because I love to paper piece. The photo above is an example of free-form strippy blocks which seems like a stress-free process to clean out a scrap bin.

I am linking up with Angela over at Soscrappy where we can share our soscrappy inspirations.

Friday, December 27, 2013

Friday Quilt Hop * 12-27-13


Seasons Greetings and Welcome to the
Holiday weekend quilt hop.


this is a wonderful tutorial.  I need to make this!  I would tweek the sizing a bit.  Wouldn't it be wonderful to make quilted purses to accentuate every season! I hate the task of changing purses,
BUT ........ I could bring myself to swap bags with just one insert.
http://efootprints.com/wp/?p=2684

a plentiful variety of tutorials
http://sewhappygeek.co.uk/index.php/tutorials/

how to make a fleece scarf
http://nebraskaviews.blogspot.com/2011/01/fleece-fun.html

some assorted tutorials here
http://inspiredbyfabric.blogspot.com/p/tutorials.html

another find of wonderful tutorials
http://bloominworkshop.wordpress.com/how-to/

Have a happy weekend and sew something wonderful!
Please leave me a comment so I'll know you're hopping.

Monday, December 23, 2013

Dresden Wreath is finished

Greetings everyone.  This is a photo of my dresden wreath.  I apologize for the yellow markings showing up,  I took the photo before I washed it.

This dresden has already had an unusual life.  It began as a bucket skill challenge over on Cbees yahoo group.  I had seen a photo of a similar item and  knew that's what I wanted to make.  The wreath wall hanging was intended to be donated for a cancer benefit that took place this month.

So, as I went to give it a final pressing before sandwiching, I used the dreaded steam and the blades wrinkled up.  I couldn't iron the wrinkles back out, so I began to unstitch the blades from the background and I intended to make new blades.  After unstitching 3 or 4 blades, I took a reality check on the holes being left behind in the background fabric.  So what was my luck of getting the new and improved dresden sewn onto the background in just the same exact place as the one being removed?  Yea, sure.  I knew better than that.

So,  I quit unstitching it and set it aside to repair what I had undone. After finishing up a few other projects, I decided I would finish it anyway, and keep it for myself, no matter how imperfect it was.  I started quilting it up. I did what I usually don't do, and "quilted it to death", which as it turns out, I really love it now!  LOL


I'm linking up with Judy over at Patchwork Times, where you will find lots of other creative quilters showing off their stuff.

I wish you a happy and healthy Christmas and New Year.

Friday, December 20, 2013

Friday Quilt Hop * 12-20-13


Good Morning. It's a quick quilt hop
leading into the holidays.


a mountain of free projects here
http://www.advanced-embroidery-designs.com/projects.html

make a quilt label
http://patchwork-of-mini-grey.blogspot.com/2009/10/day-29-of-blogtoberfest-labels.html

a slew of new tutorials
http://www.kiwiquilts.co.nz/Free+Patterns.html

some fancy tutorials here, and this lady loves to quilt it up
http://rhianontaylor.blogspot.com/p/tutorials.html


Merry Christmas to everyone!


Monday, December 16, 2013

More Tree Skirts

I made some design changes with my last tree skirt (no photo), which resulted in 36 extra wedges of green.  I decided to make some strip set wedges to go with them and get it out of my WIP box.  I have a pic of one, but both skirts are assembled.  I will quilt them up, then try to find caring homes for them next year. LOL

These skirts are a nice 50" across.  I used the 10 degree wedge ruler and Thermore Ultrathin batting in the last one and really liked the effect.


I totally enjoy Design Wall Monday. So  I am linking up with Judy at PatchworkTimes where I will find wonderful creations from other quilter fanatics.  

Friday, December 13, 2013

Friday Quilt Hop * 12-13-13


Greetings everyone.  I hope you stumble upon
some new inspiration today.


self-binding; a quick & easy finish
http://www.thequiltladies.com/2013/01/self-binding-quilt-tutorial.html

free disney paper piecing patterns
http://tweloquilting.blogspot.de/p/free-patterns.html

a nice variety of tutorials here
http://www.designsbyloftcreations.com/2010/01/tutorials.html

simply pieced, modern style quilt tutorials
http://crazymomquilts.blogspot.com/p/quiltblock-tutorials.html

they classified this quilt as traditional,  I call it gorgeous eye candy
http://bemused.typepad.com/photos/tokyo_quilt_festival/100_1448.html

I wish you a safe and sewful weekend.


Monday, December 9, 2013

Crossword Quilt - finished

I can't believe that I overlooked a post sharing my finished Crossword quilt.  I've searched the blog and couldn't find it, so I will do it today.  It really was a special endeavor and required alot of attention to detail.

The photo was taken outside and we were trying to work around the breeze.  This quilt was designed around a children's book, Cassie's Word Quilt by Faith Ringgold.  The quilt and the book were gifted to a child at the local hospital.


I am linking up with Judy over at Patchwork Times where you will find lots of other creative projects being shared.

Saturday, December 7, 2013

Scraphappy Saturday - RSC13 finale!

Yay.  I'm so glad that Angela chose December to put all our scrap blocks together, because that is exactly what I was doing.  I chose another color - cream/tan to complete the 12th block.  I put them together QAYG style.  I like the technique, but I don't like the feel of extra stiffness between the blocks, so I will be looking for another way.  I just can't handle them wider than 45-50 inches.


and this is the back:

I'm linking up with Angela over at Soscrappy where you will find lots of other creative projects going on.  I also offer up a big thank you, Angela, for continuing this program next year!  It keeps me motivated.  Even tho I have lots of yardage, I seem happiest when I'm digging the the scrap bins!

I wish you all a very Merry Christmas  and remember the reason for the season!

Friday, December 6, 2013

Friday Quilt Hop - 12-6-13


Good Morning.
 Welcome to another quick quilt hop.


some great tutorials for simple and smashing quilts
http://kateconklindesigns.blogspot.com/p/shop.html

a diverse collection of tutorials here
http://www.bijoulovelydesigns.com/p/tutorials.html

how to make a rag quilt tutorial
http://www.beverlys.com/rag-quilt-how-to.html

lots of tutorials here
http://www.dontcallmebetsy.com/p/tutorials.html

a timely tutorial for christmas stockings
http://amyscreativeside.com/2009/11/03/christmas-stocking-tutorial/

I wish you all a very creative weekend.

Friday, November 29, 2013

Friday Quilt Hop * 11-29-13


Welcome to the Friday Quilt Hop.  After you click on some new inspiration, you can run out to the black friday sales to gather some new supplies at black friday prices.  lol


6-slotted tea wallet tutorial; (I use mine for credit cards and store cards); great quick gift
http://charlottenewland.blogspot.co.uk/2013/02/tea-bag-wallet-tutorial.html

just in time for the holidays, Christmas Log Cabin
http://www.quiltersnewsletter.com/articles/Free_Christmas_Table_Runner_Pattern_Christmas_in_the_Cabin_Quilters_Newsletter_December_January_2014?bc=c

a zillion tutorials, lots to guide beginners also
http://quiltingintherain.blogspot.com/2011/11/stellar-block.html

pinwheels in chains, lol,  i like this block,  so cheery, comes with instructions
http://flutterkat.com/2011/02/rainbow-wheel-block-tutorial/

linkys to 87 block tutorials
http://quiltstory.blogspot.com/p/block-tutorial-link-up.html

I wish you a blessed and sewful weekend.


Monday, November 25, 2013

Dresden Wreath - WIP

The dresden wreath is on my design wall today. I still need to make the fabric bow. The wreath is waiting in line to be quilted.  I just finished adding the borders. The gold strip is a 1/4" flange.  I really like the effect of a narrow fange to separate and frame borders.  I think I will make the next one finish at 1/8" as I like the appearance of piping, without doing the piping. LOL  My dresden didn't come out perfect.  I will try to hide it's imperfections under the bow. Ssshh,  don't tell.


I'm linking up with Judy over at Patchwork Times  where you will find many other creative quilters sharing their design wall today.

Friday, November 22, 2013

Friday Quilt Hop * 11-22-13


Good Morning.  It's time for another quick quilt hop to start your weekend.

this one is just gorgeous, not-to-miss eye candy;lots of triangles
http://www.pinterest.com/pin/145663369168801993/

adorable for a young girl, easy jelly roll quilt
http://www.redpepperquilts.com/2010/06/more-little-folks.html

simple, modern, perfect for your "just can't cut it"  fabrics
http://forquiltssake.blogspot.com/2011/03/let-hundred-flowers-bloom.html

this is sew cute, you could use fabric or scrapbooking paper
http://suzyssitcom.com/2012/06/feature-friday-cut-paper-art.html

Mediterranean Dream, a lovely medallion style quilt, with instructions
http://ivoryspring.wordpress.com/2013/01/18/free-pattern-mediterranean-dream/


Sew many projects, sew little time.  Have a happy and sewful weekend.


Monday, November 18, 2013

Spiral Tree Skirt

This 25" spiral tree skirt is on my design wall today.  It is made with the 9 degree wedge ruler.  I saw an image of a harvest print used to make a wreath wall hanging in this style.  I chose a christmas print and set about making my wreath.  I am unhappy with the proportions.  I should have made the strip with the christmas fabric much narrower.  The design ratio is overwhelming as a wreath, so I am turning it into a christmas tree skirt for a tabletop tree.  It needs to be quilted and finished off with some red binding and ties.


I'm linking up with Judy over at Patchwork Times where you will find many other creative quilters sharing their design wall today.

Friday, November 15, 2013

Friday Quilt Hop


Let's start the weekend with
another inspirational quilt hop.


this modern and manly design has a link to the free pattern instructions
http://www.pinterest.com/pin/512566001311511306/

1930's simple - eye candy; it must be the black thread stitching that draws me in on this one
https://blogger.googleusercontent.com/img/b/R29vZ2xl/AVvXsEgJJ-EA-ttxN5b5PEYNAYCU2Di6mBV0dXbZrPm59ioANoh6zJZ7_U8hoUedpRhUNIhpWL4WWgct5T0GeTQb8sb8_F_RTfBEdFJCoy_anb-9PYsrzHpC4-b-zOKJSD17IT6IMSluW1VU1hQ/s1600/Garden+Maze.jpg

unusual origami style flowers
http://www.how-to-quilt.com/blog/fabric-origami-details/

how to create the perfect piping
http://www.elleapparelblog.com/2012/08/piping-tutorial.html

make your own wallet, a really nice tutorial
http://modestmaven.blogspot.ca/2012/02/bi-fold-wallet-tutorial.html


Have a great weekend and sew something wonderful.


Friday, November 8, 2013

Monday, November 4, 2013

Scrap Scramble Block 3 - November

I'm stitching along with Carol Doak's Scrap Scramble BOM project.  It is so rewarding to work entirely from the scrap bins.  Here is my November block,  it took all day to make it, half of my time is spent fussing over fabrics.  I had planned a different rotation of the baskets, but I made the error while putting it together.  The stitches are too tiny to bother with the seam ripper. I still like it.


If you want to see the other blocks made for this project, you will find them on the  Scrap Scramble  page.

I'm linking up with Judy at  Patchwork Times where you can see what is going on the design walls of other creative quilters.

Saturday, November 2, 2013

Scraphappy Saturday - Browns

I've grown very comfortable with earthy colors.  I really like my block of browns this month.  As with black, I dont have alot of variety in browns. I do expect that scrap bin to continuing growing.I also stitched up some brown strippy sets. I haven't decided how I'll cut those up yet.  I'm saving them for next year's project.


I'm linking up with Angela over at Soscrappy where you can see what everyone else is creating with their brown scrap pile.

Friday, November 1, 2013

Friday Quilt Hop


 Are you ready to begin your weekend
 with a quick quilt hop.........


possible arrangements with these subcuts  are  very  creative
http://roolen.blogspot.com.au/search/label/tutorial

quick and easy whirly gig tutorial
http://627handworks.com/2010/08/whirligig-tutorial/

how to make 3-D pinwheels tutorial
http://www.youcanmakethis.com/articles/post/how-to-make-3-d-pinwheels.htm

stained glass braids,I like it
http://thequilteddoll.typepad.com/photos/vt_quilt_festival_2012/dsc00517.htm

fabric basket tutorial
http://sometimescrafter.blogspot.com/2009/04/tutorial-fabric-scrap-basket.html

quick and easy gift or for yourself
http://www.aspoonfulofsugardesigns.com/2012/10/travel-neck-pillow-cover.html


Have yourself a Happy Day.

Thursday, October 31, 2013

Quillow is finished

Yay.  The quillow is totally finished, laundered and ready to be gifted.  It is really over-sized and extra cuddly as I backed it with burgandy colored fleece. My goal was for the masculine appeal.  I was lucky to have everything in my stash (except the fleece).


I wish you a blessed and happy day.  Thanks for stopping by.

Monday, October 28, 2013

Quillow WIP

Today my design wall displays parts of a quillow I am making for a very special brother.  The bottom of the photo is cut off.  The pic shows one of 3 panels which are already quilted.  The square piece with the handle is actually the pillow pocket.  I know it looks like a bag. LOL  I made it from the left-over pieces.  So much fun to be able to use those up efficiently.  The quillow has a nice cuddly fleece backing and it will finish very large - 55 x 68.

I have high hopes to get it finished up today.  I am linking up with Judy L over at Patchwork Times where you will find many other creative projects in the making.

Sunday, October 27, 2013

New Fridays Quilt Hop Button Added

Greetings everyone.  I wanted to  let you know that I have added a new button to the left sidebar which leads to the posts of Friday Quilt Hops.  So if you're trying to find a link to a project or quilt photo that you think you saw during one of the Friday quilt hops,  you can just click this button and it will pull up the list of posted links.  The new button looks like this.  Try it out.  I hope to have alot more Fridays and alot more useful links.


I hope you find these hops inspiring and useful.  Thanks for visiting.

Friday, October 25, 2013

Monday, October 21, 2013

Crossword Quilt

Our challenge at quilt guild is to design a quilt around  the story in a childrens book.  Everyone who chose to take on this challenge was given  a different book.  In December, the books and quilts will be gifted to children at the local hospital.

My childrens book is called  Cassie's Word Quilt by Faith Ringgold.  The only thing I could envision was a crossword quilt.  DH worked out the crossword for me,  I tweaked it a bit and turned it into this design.  It is very cool.  I was stitching the squares together this past Saturday at a ladies craft retreat.  It was a huge attention grabber which just added to my enthusiasm of the day.

So here is my progress so far.... the center is nearly sewn together.  Just a few more rows to join and 2 borders to add.  All these words were a part of the book.


This is what's on my design wall today.  I'm linking up with Judy over at Patchwork Times where you can see all the other creativity going on today.

Wednesday, October 16, 2013

Scrap Scramble - Block 2

I finished the 8 trees for the October installment of the Scrap Scramble BOM.  I updated the project page with the new photo.  You can find it here http://scrapboxquilts.blogspot.com/p/scrap-scramble-bom.html or by clicking the tab at the top of the page.

I didnt like them being multi-color, but they are growing on me now.  I am so traditional with authentic colors but since I wanted this bom to be completely from the scrap bins, I tried to stay with the program.

Thanks for visiting and have a blessed Happy Day!

Monday, October 14, 2013

Four Patch Posy

Saturday I took part in a workshop that demonstrated the 4-Patch Posy technique.  It was lots of fun as each block is a new discovery.  Now I find myself looking at each print fabric as a possible contender for the kaleidescope block (like I didn't know that would happen) .  Lol

I made (6) - 10 inch blocks  and (21) - 6 inch blocks.  The next step will be to determine a possible layout and complimentary fabrics to use with the blocks.  Here they are on the design wall.....


The blocks look really busy together and I plan to calm them down with some space separating them.  I am linking up at  Judy's  blog where you can see what everyone else is working on today.

Friday, October 11, 2013

Friday's Quilt Hop


       It's time to start a new weekend
        with an inspiring Quilt Hop.


a child's quilt, too cute, use the dresden template ruler

Wednesday, October 9, 2013

Bloomin Baby Patch - Finished

I made myself finish this project in record time since I had other commitments waiting in line.  Here is the finished Bloomin Baby Patch quilt - the product of our recent quilt along over at Cbees.  It really turned out great.  It measures 44" x 48".


Here is the back.  I used a cushy purple fleece.  I am really satisfied with the results. I will be using fleece for my backing of children's quilts from now on.


May you have a blessed Happy Day and thank you for visiting.

Sunday, October 6, 2013

Queen of Diamonds update

It's been a long time since I've posted about my english paper piecing (life-long) project which I've termed the Queen of Diamonds.  I have been working on it occasionally. I am not nearly halfway finished, and yet someone may inherit a half-completed, albeit magnificent Queen of Diamonds quilt top.

In the meantime,  I've re-arranged some diamonds, sewed some into sets of four and laid them out again. I am sharing a new photo here.


I have a page created just for this project. You will also find two tutorials about beginning english paper piecing projects.

Friday, October 4, 2013

Friday's Quilt Hop

Start your weekend off with another quilt hop of amazing quilts.........


Bargello Illusion

this is a fresh looking christmas runner

modern baby quilt with tutorial
http://aspenhill.wordpress.com/2011/04/13/avignon-baby-quilt-and-help-me-win/

I want to learn how to do this sashing
http://www.greenfairyquiltsblog.com/2011/08/quilting-finish.html

this quilt is outstanding in all ways; applique, design & dresdens
http://www.pinterest.com/pin/512566001311291290/


Monday, September 30, 2013

Bloomin Baby Patch

A Bloomin Baby Patch quilt is on my design wall today.


Hop on over to   Patchwork Times   to see what other creative quilters have on their design wall today.

Friday, September 27, 2013

Blooming 9-Patch Quilt Along

We are having a QAL over at Cbees yahoo group this weekend.  There are some questions on how to go about the planning of a Blooming 9-Patch.  Since I can include photos here, I thought I would show how I am approaching my plan.

The quilt is 45 x 49 inches.  All the blocks finish at 3 inches.  Here is my quilt layout:  


Fabric Requirements:
            It may seem odd, but if I have limited quantity of a fabric, I figure my needs in inches.  I have only 35" of my dark blue paisley. EQ said I needed 1-1/4 yd for this fabric.  So, I worked my cutting out in inches,  a daunting task.  Hopefully no errors,  it came out needing 32".

I am concentrating on the center design for now. We'll deal with the borders and binding later.

               dark blue paisley ...............  32 "
               light blue ...........................  16 "
               light green .........................  26 "


Cut the squares and triangles first. You can cut from the leftovers to use in the 9-patches.
                                                                                                                                                                 
                                                                                                                                                                                                                                Cut  ( 36 )  squares  @  3-1/2 "


Cut  ( 18 ) squares @  3-1/2 "


Cut  ( 2 )  strips @  6 ";  from these strips cut : 
these are slightly oversize, but you will trim them later, plus you will get more cutting options from the leftover

    Cut  ( 8 )  squares @  6 "                                         

 Cross cut the 8 squares into 32  side triangles; you will be using 30 triangles
      

Cut  ( 4 ) squares @ 3-1/2 ";  2 of these are for the quilt center, 2 are for the corner triangles
Cross cut 2 of the above squares into ( 4 ) hst for corners


Make  30  @ 3-1/2 "


Make  6  @ 3-1/2 "


Make  14  @ 3-1/2"


Make  22 @ 3-1/2"


Friday Quilt Hop

Lets start the weekend with a quick quilt hop:


I usually don't like selvege quilts, but this one is sew cute!
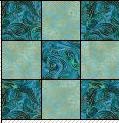

so modern, so simple, such variety


amazing detail of a furry friend


this one will wow you


a simple quilt using stripe fabrics

Monday, September 23, 2013

16-Patch Star Quilt

This is what's on the design wall today.  I have been taking part in the Rainbow Scrap Challenge 2013 over at  Soscrappy . Every month we dig out the scraps of a specific color family and create anything you want to.  I have been making these blocks at 16" finished. Only 3 months to go and it will make a hefty 48 x 64 before borders.


Hmmmm. I wonder what I'll do for next years' scrap challenge?  I'm already on the lookout for a new plan.  If you want to jump on board, just click the RSC13 button on my left sidebar.  I love her rules.  You are never behind with this challenge.

So hop on over to  PatchworkTimes  to see what other ambitious quilters have on their design wall today.

Saturday, September 21, 2013

Scraphappy Saturday - More Baby Blues

I took time to use some more baby blues this week, although it was from larger pieces of scraps.  This is a purse tissue cover which holds those little packets of tissues without the noise of the plastic wrap.  If I run out of tissues, sometimes I will use a few table napkins or fold some tissues from the large Kleenex box.


I didn't have time to use more of these blues or make crumb blocks this week because I was deep into mass production of these tissue packets.  A special 'Sister' at the catholic retirement facility asked for more of these for their gift shop.  She uses the proceeds from the gift shop to help feed the hungry.  I love the opportunity to gift her.

So ...................................  I made 48 of them.  I will keep a few to give to the special ladies in my United Methodist Womens Circle. Once I started giving these out, they have become very popular.  Here is the most recent batch.  I hope I won't need to make any more this year.


I am linking up with   Soscrappy   where you can see what everyone else is doing with their baby blues this week.

Friday, September 20, 2013

Friday's Quilt Hop

Greetings!  I'm not quite ready to share my current quilting project,  so  I'll share some inspiring quilts.


This is a gorgeous medallion with traditional quilting specific to the block units

Just in time for autumn, 

Amazing Art, I would love this on my wall

A tutorial for an easy Christmas Tree skirt

I love them all - real and quilted


I hope you find something inspiring and wonderful to start your weekend.

Monday, September 16, 2013

Scrap Scramble - Block 1

It is Design Wall Monday. I am sharing my first block of  a new paper pieced  BOM.  It will probably  be made entirely  from my scrap bins that never get empty.  This is September of the Scrap Scramble project.


So hop on over to  Patchwork Times  and see what everyone else is quilting up today.

Saturday, September 14, 2013

Scraphappy Saturday - Baby Blues

Here is my 16-patch scrappy star block for September, my baby blues from the scrap bin.  I am a few months  behind in my 6" crumb blocks and more projects are getting in line, so that may have to be a focus for next year.  My photography is always a challenge and these blues are really a softer shade than they appear here.


So hop on over to  Soscrappy  and see what everyone else is sharing for their RSC13 challenge for September baby blues.

Friday, September 13, 2013

Friday's Quilt Show

Sometimes I am clicking the internet, collecting new inspiration when I should be sewing something or cleaning something.  So, I thought I would share some eye candy, pattern links and tutorial links here.  So now you can click your way to new inspiration.


Wow. This one is really cool
this is a fun one
if you like paper piecing
a plentiful listing of tutorials


I hope you enjoy the show and find something wonderful!

Thursday, September 5, 2013

Hanging Sleeves By Machine

I attached the hanging sleeve on my Autumn Sampler WH totally by machine.  I took a few photos during the process so I could share it with you here.

I  finished all the quilting first.  I trimmed my piece to its finished size, right up to the binding stage.

I have a narrow border strip separating the quilt center and the final border. This strip will frame the quilt center and serve as a placement guide for attaching the sleeves.


What size to cut your sleeve?

The width of the sleeve will be determined by the width of your final border, times two (2) plus one inch or so.  One half inch will be taken up in the seam allowance when attaching the folded edge.  The other half inch (or so) is extra insurance that your sleeve will reach the raw edge or beyond, when folded up into place.

my final border    2.25 inches
to double layer          x 2
plus SA & extra        + 1 inch

sleeve width =     5.50 inches
                              ====


Length of Sleeve?

I usually like my sleeves to have an opening in the center of the quilt.  This lets me choose other hanging options such as using a dowel supported in the center or using a rod supported at both ends.  So I cut one long sleeve, then cut it in half.

I also make one long sleeve for the bottom of wall quilts to insert a curtain rod, dowel, ruler or yardstick. This helps them hang straight and hug the wall. Do NOT cut this one in half.

The length of the sleeve depends on the width of the quilt.  This quilt is 25 - 1/4 inches wide.  I'll want my sleeve to reach about 22 inches. I have to add an inch for hems on the short ends.


So, I will cut 2 sleeves at 5 - 1/2"  x  23".

Cut one sleeve in half; fold in the 4 short ends 1/4", then fold over again - 1/4" ;  iron and stitch.
Fold in and stitch down the 2 short ends on the 2nd long sleeve also.  Then,


 With wrong sides together,
 press in half, lengthwise


See the yellow flowerhead pins?  This marks the seam between the narrow black border strip and the outer border.  The pins are my placement guide on the back for setting in the hanging sleeves.


Turn the quilt over to the back.  Place the sleeves 1/4"  over/above the pin markers so the folded edge is above the pin markers and reaching for the top of the quilt and the raw edge of the sleeve is reaching for the bottom edge.


Near the folded edge,
baste in place.


Turn quilt to right side, stitch in the ditch (SITD) around the frame border.  This step will include the folded edge of the sleeves.   Remove the basting.


I like my quilt to hang above the rod, so I stitch a "stopping point" through the sleeve pieces.  This allows the rod to stop at the middle seam and not go all the way up to the binding.

Spread the sleeve pieces away from the body of the quilt.  Stitch another seamline through both layers, about 1-1/2" from raw edges of sleeves.  This will allow the quilt to sit about 1" above the rod.


Press sleeves right side up/forward,  so the top raw edge meets the raw edge of the quilt.  If you added extra for insurance on the sleeves, this is the time to trim them even with the quilt edge. Secure the sleeve edge with pins until the binding is stitched on.


Add the Binding

Now you can add the binding. This step will enclose the raw edge of the sleeves.  I have been stitching my binding to the backside first, then folding to the front and top stitching down.

Here is a pic of my finished quilt with sleeve.  I don't often take time to make labels, especially on small projects.  Some projects I like to acknowledge I made them (grin), so I use the text font on my sewing machine to stitch my name and year. I incorporate that piece into part of the sleeve.   Ah, shortcuts............... makes time for more quilts.   LOL


I hope this tutorial gives you some new methods and ideas.  I wish you a blessed and Happy Day!