Monday, March 18, 2013

QAL Instr #2

So far, so good. I've managed to keep up with the quilt-a-long at patchworktimes.com.  Here is another set of 6 blocks for my "QOV"  Road to Round Rock project.


This set finishes off the outside perimeter of the design.  I guess we'll now be moving on to smaller half square triangles.  Wish me luck.  LOL

Road to Round Rock Instr # 1

I have been working on Instruction #1 for the Road to Round Rock quilt-a-long.  You will find a link to this project on my left side bar.  Judy Laquidara  is the designer.  She has displayed several different palette options on her main post.

I opted for the quilt of valor (QOV) red/white/blue.  Here is my blocks from Instruction #1.


Now on to Instruction #2.  The steps are being published on Monday, Thursday and Saturday....just enough time to be able to keep up and not dragged out too long to get bored.

Thank you, Judy, for offering this inspiring project.

Saturday, March 9, 2013

Scraphappy Saturday - Orange 2

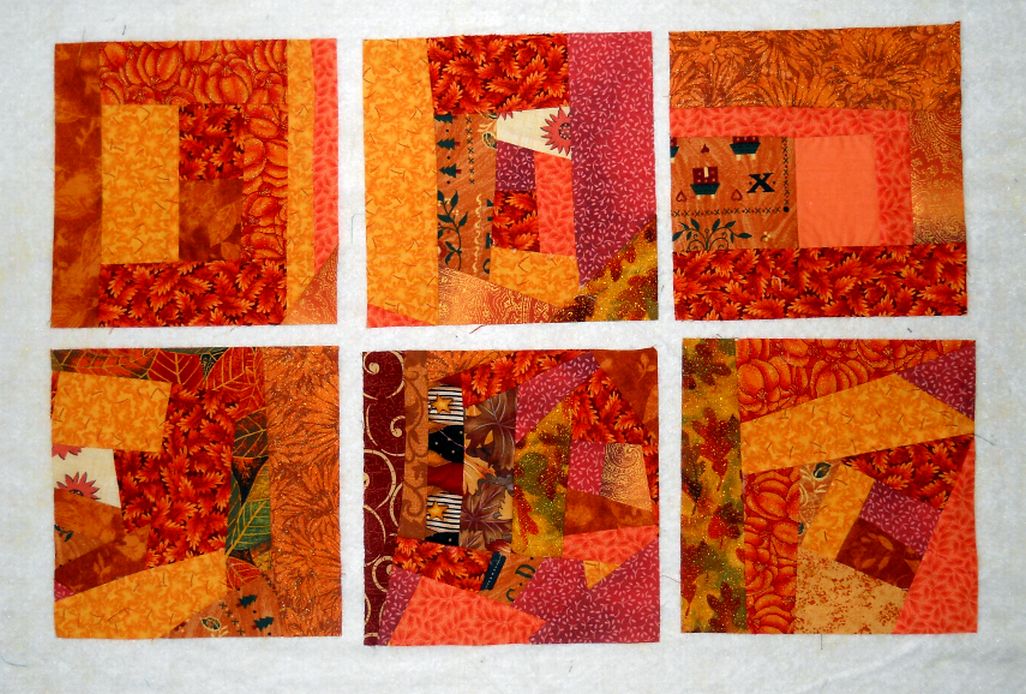
I decided it might be productive to continue to work out of  the orange/rust  bin until the scraps are under control. So I started making crumb blocks - large ones at 6-1/2 inches.  I will put them aside until I choose a block setting to insert them into.


In the meantime, I started paper piecing the very small pieces into a miniature wreath.  I am afraid these tiny 2-inch blocks take up  ' more time than fabric'. You can find the pattern I am using  HERE.  Maybe I will get this finished in time to show off on another scraphappy saturday.

Take a visit to the Soscrappy blog where the Rainbow Scrap Challenge has a link-up to all the other scrappy eye candy of the week.

Sunday, March 3, 2013

Stitching on Sunday

After church, I spent a couple hours experimenting with materials and methods for little items.....for instance, would it be better with some stiffener, with some batting, what kind of batting,  how stiff the stiffener??? So I fiddled and fudged with a variety of components.  As it turns out, none of my experiments resulted in a gifted product.

Then, I remembered my labor yesterday. After I finished  the orange floating star block for the RSC13 challenge, I went back to making patriotic tissue covers. I finished 15 and I have the basket full here to show off.


I think I'll do some more experiments tomorrow.

Saturday, March 2, 2013

Orange Scrappy Saturday

I admit I did not have alot of orange scraps.  I used most of them in my cards of pumpkins last fall.  I have alot of rust scraps, but not really bright orange.  So, I scrounged up a few from my scrap bin, I pieced a few together to make a square, and then I raided my charm square box.  I nearly had to rummage for yardage.

Thankfully, I squeezed in another scrappy floating star block for my collection.


I have other plans for those really small pieces.  I hope to have them stitched up for next Saturday.
In the meantime, visit  Soscrappy's  link up page to see all the other orange items being created.

Friday, February 22, 2013

Scrap Happy Saturday - February

I was inspired to participate in the  Rainbow Scrap Challenge 2013, aka RSC13.  It came at the most opportune time since I had already written on my personal quilting bucket list to take back control of my scrap bins!  I considered doing this one drawer at a time. They are already sorted by colors, so that was helpful. So, I must be ready to do this challenge, right ???

I am a follower of Lesley over at  The Cuddle Quilter.  Last Saturday, her post for the RSC13 caught my attention, we exchanged a few words (LOL) and she convinced me that I could catch up.

Now,  my scrap bins are stuffed with every size and shape imaginable. I  love to paper piece, so I am not inclined  to toss out any piece of scrap. Is it big enough to be the twinkle in someone's eye (after seam allowances)?.....maybe I should keep it.

I decided to keep my challenge on the easy side, for now. I picked a block that would work up large and make a nice, finished quilt.  Now my squares are cut at 4-1/2 inches and the block finishes at 16 inches; a nice, hefty size  for a 12-block quilt. This doesn't solve the control of all those other scrappy strips and pieces.  I'm still pondering that situation.


In the meantime, I've caught up with January's pink and February's purple challenges.  I'm linking up with  Soscrappy  here.   Come check out all the other link-ups and see what other scrappy creations are being shared.

Monday, February 18, 2013

The Irish Have Landed!

I've finished my Shamrock wallhanging.   The background white fabric is so cute, those little dots are actually tiny shamrocks.  These fabrics were out of my normal range and fun to play with.  I re-created this design from a quilt I found in one of my google search travels.  It was a very old photo.


This is a little runner that is on my buffet.  It is a design that I improvised from a table runner displayed on a website.  It was very easy to put together....................except for binding the odd corners.


Last, but not least, is the little 12" x 14" mini quilt for the table top frame. The Irish have landed!


  Don't forget to check out the Shamrock Tote Bag  and  Skinny Mini Wallhanging
.
  HAPPY  ST.  PATRICKS  DAY !! 

Saturday, February 16, 2013

St Patrick's Skinny

It's been a struggle in the quilt cave today.  You know - those days when a little bit of everything just doesn;t go quite right?  I have been working on my holiday set  something like a production line .... do one task on all the items before moving on to the next task.

Now I am in the finishing stages - sleeves, hangers and bindings.  This next piece is ready for the wall - the St. Patrick's Skinny.  I like the feel of the applique motifs.


I was hoping I didn't have to change the thread again (which may be a clue as to why I don't use the embroidery part of my machine); but alas, I forgot to put the sleeves on the other pieces with the black thread.  That's the combo that was giving me fits.

I wish you all an early Happy St. Patrick's Day!

Tuesday, February 12, 2013

St Patty's Tote

This is the first item in my small series of St. Patrick's Day decor.  My Irish quilted bag.  I  want to add a closure that wraps over the top of the bag; but I will look for the decorative hardware first.  It's extra cushy.  The bag is quilted with cotton batting and the outer pocket layer is a separately quilted unit.


Thursday, February 7, 2013

Stack and Whack - Finale!

It seems like I've been gone forever -- well, nearly two weeks!  I have been doing a mountain of work on this stack and whack creation.  It has been a project that kept evolving; step-by-step; piece-by-piece; strip-by-strip!

When I decided to take the bucket skill challenge for January, I had NO IDEA it would turn into a major fiasco.  Well, our new bucket skill for February has already been drawn and I'm just finishing up my stack and whack project.

When I began, it didn't occur to me that I would be making eight blocks.  LOL  I thought I'd stitch up a block or two and decide what to do with them later.  HA!  My conscience couldn't take this attitude with eight blocks, so I had to create a quilt around these blocks.  There was not enough fabric to finish it off with  borders on all four sides, so I started cutting it apart in strategic places; added gold or green or burgandy-wine fabric strips.  Some places I had to add some kona snow and some fancy machine stitching.

This is the result.  My quilt is finally finished and I just might be keeping this one for myself. (wink)


Thank you, Debby Kratovil, for your tutorial to make these blocks.  You can see all my posts for making this project  here.  Gee,  what will I do next?

Friday, January 25, 2013

SnW Block # 7 & # 8


This is it........my last two blocks.  Now to work out a layout and get it made into a top.  For some reason, as I began the first cutting of this little challenge, it didn't appear to me that I would be making a whole quilt.

If you want to see all eight blocks, you can find them here:    stack and whack blocks

Wednesday, January 23, 2013

SnW Block # 4

Here is block #4.  I had considered placing the triangles with opposite ends pointing to the center, but that would have reversed the symmetry of the block rotations, so I stayed with the original plan.
Block # 4

SnW Block # 3

Block # 3

Tuesday, January 22, 2013

SnW Block 2

Here is block #2.           

Stack and Whack

Unfortunately, stack and whack is the challenge that was drawn for our January bucket skill over at Cbees yahoo group. Please know that you have to be a member of the main list, Cyberquilters  before you can join Cbees, but membership is free  LOL  and they are the greatest groups for quilting.

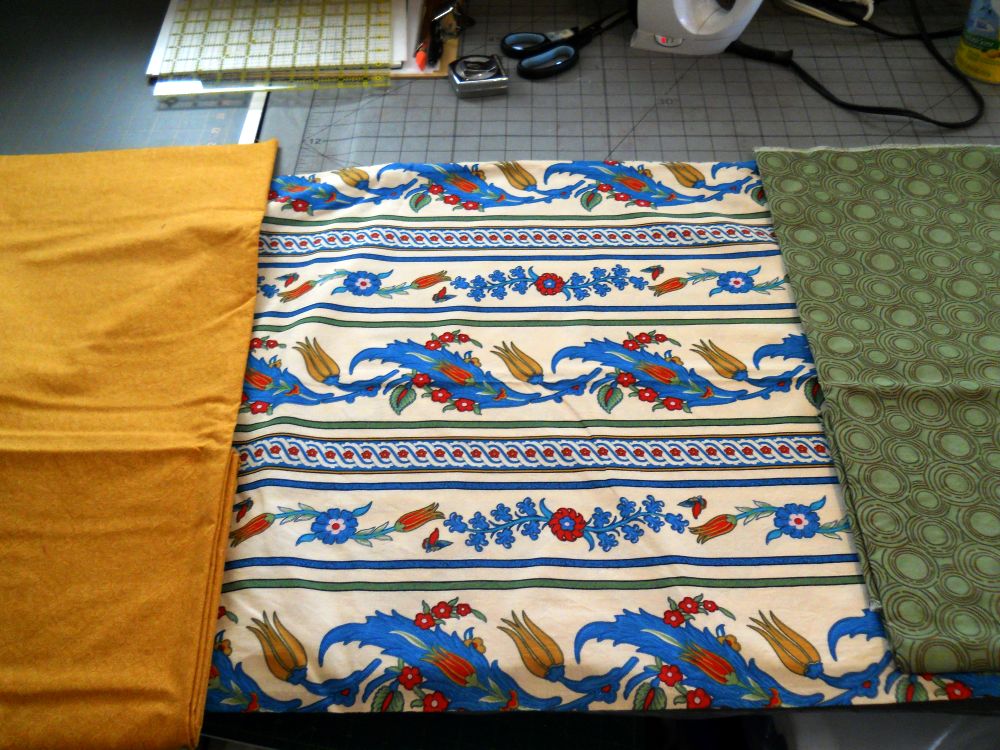
I deliberated all day (okay all month), about the possibilities of my stack and whack project.  Today, I pulled out the appropriate fabric and went at the process - with the help from a  Debby Kratovil  post.  This is the fabric I used - a wide border fabric with lots of background.


This is my first block # 1.  I have to say that I had to approach the cutting process in a different way. I'm not sure I can put it into words.  I pulled a Frank Sinatra, since I was unable to get the "pin matching" method to work for me. :-)  But I did follow through on the 'whack' part!


The background is actually a med-dark green. I'm not sure it was a good choice.  It is what it is.  lol  Now on to block # 2 ?

Sunday, January 20, 2013

Shamrock 9-Patch

I found the cutest fabrics for St Patty's Day.  I started to cut them up. I know it   ' SEEMS '  early,  but ....you just don't realize how long it takes me to do anything.  I want to make up a holiday set with this fabric - I dont want the patterns to match,  just keep it interesting.  I started early because  I  know  other commitments will sneak into my schedule.

So .................... here is my start.  I made up this shamrock to set on point for the medallion center.  It is a 15 inch block. The white stitching on the stem is just temporary basting.


Now, on to some border treatments..........................................................

Wednesday, January 16, 2013

Baby Bibs

I've been stitching up some bibs and burp cloths -  not my favorite quilting time, but it was a diversion for a few days work.  Here is a batch of 15 bibs.  They were sewn on a foundation from strips in the scrapbox, then backed with flannel.  I used up the rest of the flannel on burp cloths.  They are in a pile at the top of the photo.  They were nice n easy sewing.


I must admit that my scrap boxes are still totally out of control, even tho I just finished a 24 - block string quilt. I will have to do a serious manicure in those scrap boxes .............. as soon as I get my St. Patricks Day items made.

Sunday, January 13, 2013

Saturday Sew-In

My local quilt guild had our monthly sew-in yesterday.  It's always fun to gather with other quilters and share tips and tricks and get some stuff projects done.  I have to talk myself into going each month because I hate packing..............anything.  I always have a grand time while I'm there and I come home saying "all in all, it was a great day",  but did I mention I hate packing? !  I would rather unpack anytime.

When I left yesterday, my sewing tables had been in orderly service. I had been quite productive for the last couple weeks because my work tables were in order, cleared of any other "stuff in the way" and that always opens up my creative inspiration.

Today, my tables are heaping with bags of stuff, I had to disassemble a corner, so DH could get at the plug behind the sauder cabinet. We had to get the machine back into it's table bed and somehow the footpedal came apart, a tiny plastic knob is broke off and we can only hope it works right.  It had gotten stuck a few times while i was "stoppin and startin"  while stitching on applique.  Sometimes the machine didnt stop when I wanted it to.  That could be a problem.

Well, anyway, I only got half of the bibs finished.  I had such big hopes of 15 bibs finished and 10 burp cloths.  Now, I'm trying to put my sewing space back together so I can finish up this job. I hope I will have forgotten today when I go to pack it up for next month.  :0)

Thursday, January 10, 2013

Purple Heartstrings Quilt

Heartstrings had a challenge over the New Years' holiday weekend. It was to make string blocks with purple centers.  I had a piece of purple and used up every bit for these 24 string blocks and binding.


The blocks are now sewn together into a top, just waiting to be quilted.  It will be a comfort quilt for the childrens' ward at the local hospital.  If you are looking for some great inspiration for comfort quilts, just click on the Heartstrings button on my sidebar and don't worry about running out of strings....ask me how I know.

Wednesday, January 9, 2013

Iron Caddy 2

I have finished an iron caddy for a special quilter-friend who just happens to have the same iron for quilt club, the Rowenta Travel size iron. She loves batiks.  I have to say my collection of batiks is "shabby', at best.


But I think she'll love her little purse caddy anyway.  It was easier to make, the second time around, for me, too. I think I'll make some construction notes, before I forget again.

Tuesday, January 1, 2013

HAPPY NEW YEAR !

If I can't be sewin, I'd love to be rompin with these little guys!  Awwww .................


May your year be filled with much of Gods' greatest blessings.  Happy New Year !

Monday, December 31, 2012

Log Cabin Christmas Tree .... con't

I managed to get the blocks sewn together for the Log Cabin Christmas Tree.  I didn't want to put the project back on the shelf and have the layout all mixed up again.  Now it can go back on the shelf. :-)


Next step is a border. I am thinking about a log cabin variation block using lots of red scraps.  In the meantime, some other items have jumped to the top of my list.

Happy New Year ......................... Everyone!

Friday, December 28, 2012

A Prayer To and From Sandy Hook

I'll just share the link to this website. The writer has written an amazing poem of vision, from the children and from God, our Creator.


This read is a comfort for the soul.  Thank you, Judy C.

Wednesday, December 26, 2012

Holiday Treetops

I wanted to share a pic of my latest mini wallhanging.  It is a whimsical tree in christmas fabrics.


This little item is a replica of a photo of a mini project that was shared on another list.  So, sorry, I cannot share a pattern since I don't know where the pattern comes from. I knew right away that I had to make it, so I drew up my own rendition and pulled out some scraps!

Now on to finishing some other projects. I hope you're getting time for some quilting therapy today.

Monday, December 24, 2012

Christmas Eve Prayer

CHRISTMAS  EVE  PRAYER

Help us remember the birth of Jesus that we may
share in the song of the angels, the gladness of the
shepherds, and worship of the wise men. Close the
door of hate and open the door of love all over the
world.  Let kindness come with every gift and good
desires with every greeting.  Deliver us from evil
by the blessing which Christ brings, and teach us to 
be merry with clear hearts.  May the Christmas 
morning make us happy to be thy children, and
Christmas evening bring us to our beds with
grateful thoughts, forgiving and forgiven, 
for Jesus' sake.  Amen.

                                                *  Robert Louis Stevenson

Tuesday, December 18, 2012

Log Cabin Christmas Tree

A few days ago, I decided to fill in some sewing time by stitching up some more scraps. The bins are overflowing again.  I pulled down a project that was stashed at the top of my souder cabinet.  It has a partially finished wallhanging.  The log cabin blocks are actually scrappy, but this mock up in EQ shows the basic plan.


Today, I'm down to the final 8 background blocks.  I think I'll sew this plan together before I decide on the final border treatment. Then I can audition possibilities.

If you have any visions for an appropriate border, I welcome your comments!


Monday, December 10, 2012

Quilt Block Recipes

Greetings everyone. I have added a new page, "Quilt Block Recipes".  When you visit there, you will find the list of quilts/blocks/projects that I have created a post about. I hope this new page will condense and collect the offerings on this blog. This page will have just a photo of the project. Click on the name title to link to the post and project files for that design.  I will try to keep the entries in alphabetical order and easy to find.

Just click on the tab to go to the recipes.  I will be adding more as inspiration knocks.  Thank you for visiting!

Saturday, December 8, 2012

Midnight Star Quilt Block

Susie at starwood quilter shared her rendition of the  midnight star block and provided the link to the pattern at  quiltmag. Naturally, I went looking for secondary designs, so I turned to my EQ program for help.

This is a 16 block quilt ( 4 x 4 grid), created using the full Midnight Star block.


What if I considered just the quarter unit?


       Here are 16-blk sections (4x4 grid) of the quilt using just the quarter block. This breakdown lets you pinpoint elements in the unit and control your color play, You could change the whole effect of the quilt by altering color placement.


and if you rotate the quarter blocks again, you can get this lovely rendition.


Thank you, Susie, for sharing your blocks and histories with us and inspiring our creativity.

Thursday, December 6, 2012

Nativity Wall Quilt

I quilted up a wall hanging this week. I had gone digging in a stash box for some flannel and stumbled upon this panel.  LOL  So being the Christmas season, it only seamed  fitting that I push aside the next project and make room for holiday stitching.


This is a preprinted Nativity Panel. I didn't have time to decide on a fancy border and stitch it up, so I settled to quilt and bind the panel,as is.  I have two more panels in the stash. Maybe I will figure out a plan to enlarge them.

May you all have a blessed Merry Christmas!

Friday, November 30, 2012

Snug as a bug in a Mug Rug

I have been busy fussing over mug rugs. I have not accomplished anything monumental! I am  ready to move on since one rug hit the waste basket and here is the rest of them.  Not one of them even close to perfect.


Is it normal for the smaller items to be more difficult to create than the large ones?  I kept changing techniques, as each one produced  unsatisfactory results.  I had planned to present these items along with a new mug and some christmas candy as hostess gifts.

Now I have so much christmas scraps strewn about. I think I'll stitch them up into log cabin blocks and do some mindless sewing. .... just have to decide on the block size.

Saturday, November 17, 2012

Scarecrow Wall Hangings

I had four decorative scarecrow picks, so I had to build wallhangings around them.  I think I'll have to put away my autumn fabrics sooner than I am ready, but I do have to rush into christmas before it passes me by.

So here is my batch of scarecrow wallhangings, finally finished. You can see that they are all a bit different, because I always have to deal with the  "what if "  factor.  The fourth wallhanging is shown in an earlier post.


I wish you all a very blessed Thanksgiving Season.  We have SO MUCH  to be thankful for, may we always remember.

Saturday, November 10, 2012

Scarecrow Mini

I built a pumpkin field around this cute scarecrow pick. I had some fabric with pumpkins too. I backed them with fusible and cut them out individually.  I  made a facing for the fence to give the top edge a finish, which left an opening to insert the stick.


 I bought 3 more scarecrows, so I'll need to make more mini quilts and use them as gifts, or I could put them in the craft bazaar next year.

Friday, November 9, 2012

Fall Projects Finished

I have finished another pumpkin mini that is displayed on my wire table top frame.  I made one last year. It was a mystery block at paperpanache.com.  She creates wonderful patterns for paper piecing.  Anyway,  I had my little pumpkin on display  at a craft bazaar recently , and DH sold it.  LOL  It was so special, I had to make another one.

This one has a story of its own.  It's the first time I've  unstitched a completely finished binding.  The first binding matched the golden flange separating the border from the block. I didnt give it a thought. I just made the binding in the same fabric because it was pretty and went well with the border fabric and the backing.  Well, it was so over-powering, I couldnt stand it!  So I have to say this binding now blends into oblivion, which is what I wanted.


Stay tuned for another fall project finished..................................................................

Friday, November 2, 2012

QOV TATW top finished

I have my first QOV top assembled.  It was a bit of a challenge.  Too much cutting, pressing, sewing, unstitching, re-sewing ............... . Was I supposed to spray starch the strips into cardboard-like pieces first?

The quilt itself is lovely - bright, deep reds, rich royal blues and a soft blue and white. The trip around the world layout is so nice. I have new ideas for using scraps plus a few standard color strips. I would conduct the construction differently, avoiding the unsewing, if I'm making ALOT of blocks.

So, here is my QOV top. I keep humming a certain, old song in my head   "From A Distance" by Bette Midler.  It looks beautiful   "from a distance".  Some squares are a bit wonky, some seams do not intersect to perfection.


Our soldiers are SO worthy,  so off it goes to Alycia. My contribution to the Quilts of Valor mission! I hope you will find time to contribute some blocks for this program.

Tuesday, October 30, 2012

QOV TATW Blocks con't

I've just finished sewing my 24 blocks, albeit slightly imperfect.  Now to get those sewn together and shipped off to Alycia. But that won't be tonite.  If I have encouraged you to make some TATW blocks and send to  Alycia,  please tell her I sent you!  Photos of my quilt tomorrow!

Saturday, October 27, 2012

More QOV TATW Blocks

I decided that four blocks that blend together perfectly deserves to be an entire quilt.  So, I have started cutting my strips to make 20 more blocks.  There will be a few areas that are scrappy, but contain the same color value. There will be a few areas that are consistent with the same fabrics.


This project is an unexpected detour from the stitching plans I had laid out this week.  When you are inspired with something, we have to run with it, without delay. When my blocks are all stitched, I'll send them off to   Alycia   to contribute to her campaign.


Friday, October 26, 2012

TATW Blocks

Here is a set of four blocks. I ran out of one red fabric, so I can't make more matching blocks. I will have to go VERY SCRAPPY next time.  I wonder if I can control a few areas just enough to "separate and contain" the scrappy ones?


I did some figuring.  If I cut a 16" wide piece from each of six fabrics, I could cut 16 strips from each fabric. Each strip would make one block, so I could get 16 blocks from these cuts.  That is a nice layout. It would be 48 x 48, plus borders.

But I do prefer the 24 block layout, 4 x 6 grid. This block works nicely in even numbers.

Should you have an  odd number of blocks, or very scrappy blocks, then the straight furrows layout might look nice.


Here is one with 1/2" sashing separating the blocks.


So I wonder how to control the scrappy?  Would I use the same fabric in position 1  (white) and another same fabric in  position 3 or 4 ? This sounds like another mission for EQ!

I hope you will find some time and fabric to make some QOV TATW blocks.  If you send 5 blocks to  Alycia ,  she will enter your name in the drawing for a chance to win 5 yards of fabric.  I think I'll try a scrappy one now.


Thursday, October 25, 2012

QOV TATW Block

Well,  you'd have to be a quilter to decipher the written word to all these letters....QOV  TATW !  I have one block done!  I had other things to do today, but I did get one block done and it is so pretty, I hope to have enough of these fabrics to make a 24-block set.  I don't think there is quite enough of these fabrics, but maybe they will multiply like bunnies during the night, like my scrap boxes do!

So,silly me,  just had to show you my one block. Now dont criticize my photography skills!  I havent taken the time to make up my design wall yet.  But I can picture this block rotated into a gorgeous quilt!


So come on, as Eleanor Burns says, get strippin!

Quilts of Valor Block Drive

I support the Quilts of Valor Block Drive initiated by Alycia.  You can get the details of the block drive here at  http://alyciaquilts.blogspot.com/2012/10/quilt-block-sew-long.html.  She has created a clear tutorial for constructing the block, borrowed with permission,  from the queen of scraps herself, Bonnie Hunter.

Should you have a generous nature, you can show appreciation for the sacrifice others have made for our freedom. Will you  make up a few blocks and send them on to Alycia.?  She will enter your name for a prize drawing of 5 yards of fabric!

If you are not able to send in blocks, go ahead and try out the tutorial for the Scrappy Trip Around The World block. It is a fun technique. You only need 16 inch length of strips.  Here is a couple layouts you might use for these blocks.


This quilt is a 4 x 4 grid,   16 blocks
It finishes at 60 x 60


This quilt is a 4 x 6 grid, 24 blocks
It finishes at 60 x 84


A little more fine rotation, same blocks, you can control the flow of colors. I like this one!


I hope you will consider being a part of this program. I thank ALL OUR MILITARY for their service!  Thank you!

Tuesday, October 9, 2012

Friends & Family Wallhanging

As soon as this pattern was released in the October issue of Quilters World, I put it at the very top of my to-do list.  It is the Friends & Family Quilt by Bev Getschel.  I found the perfect paisley print for the branches, leaves and border. It has burgandy, brown, aqua and a touch of tan. What a joy it is when you find the fabric that is perfect for your project.

I am making this project at half scale of the original pattern, so it will end up being about 25" x 29".  Today I assembled the background for the applique.   I have to make everything based on 1" finished strips. Here is a photo of my work today.  It was a challenge to work these strips into their diagonal placement. I had to wing it along the way.


It came out really pretty.  I trimmed it oversize until I get the applique pieces on.  Now should I add the fused applique first, then quilt around it?  The pattern has ALOT of branches and leaves. I probably wont enjoy machine stitching every little piece.  Should I make the quilt, quilt the background, then add the applique and stitch it down by machine?  Should I take the easy route and do the machine quilting thru the entire piece,ignoring applique placements?  I havent decided that yet.....BUT.... I still have to prepare the applique pieces, so there is time for more decisions. I bet my cyber friend, Bonni, could help me decide.  She is totally hooked on applique.

The October issue of Quilters World has a few really great projects that inspire me. I am hoping for a quiet winter with lots of time to spend in the quilting cave.  The Sticks & Stones Quilt could make a dent in those scrap boxes.

Friday, October 5, 2012

Autumn Display

I used to get distressed when the fall season came upon us.  Not because I would be another year older, but because it was just too close to winter.  I could never tolerate winter.  But I truly love the colors of autumn and the changing of the seasons. It is a reminder that God is indeed constantly at work.

I have also been constantly at work these past few weeks.  I have been making an assortment of fabric greeting cards - 100 of them, actually! I am preparing for a Harvest Fair to take place Oct 13th!

This photo is a temporary display of some of my pieces. The quilt on the wall is not for sale in the bazaar. I just love it to pieces. I made it several years ago and I quilted it by hand. I am not able to quilt by hand anymore.  I hope to enjoy it for a few more years.  It is a pattern by Lynette Jensen.


After fussing over 100 cards, I am ready to move on to another project.  I already know what that  will be, a special design from the most recent issue of Quilters World. Stay tuned.

Thank you for visiting. I wish you a blessed day!